Contact Us: 02476 440404
Contact Us: 02476 440404
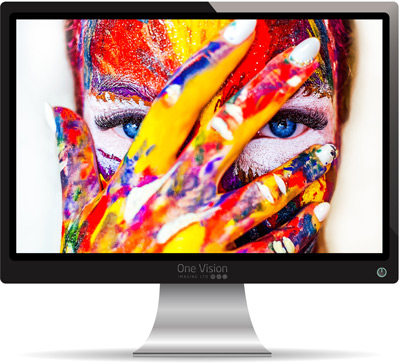
The first step in getting good, consistent colours in your prints is ensuring your monitor is well calibrated. In order to properly calibrate your monitor you will need an external device such as a Datacolor Spyder or X-Rite i1 Display.
Your screen should be calibrated for:
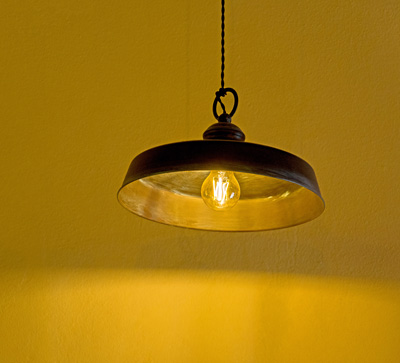
An important factor not to be overlooked is the ambient lighting around your screen. The closer the ambient light is to true daylight, the better. As a general rule of thumb, desk lamps and traditional household bulbs have a low CRI (Colour Rendering Index) which is probably around 70-80 of a possible 100, this results in the human eye seeing a colour shift when viewing your screen. The lighting in our laboratory is controlled to a CRI no lower than 98, meaning we can ensure consistent colour corrections across the whole colour spectrum.
If you're serious about colour management and process a lot of images, consider changing the lighting near your screen to daylight rated bulbs. These are typically bulbs with a temperature rating of 5000K - 6500K.
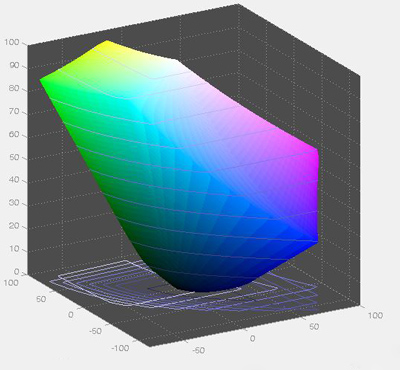
The purpose of soft proofing is to highlight areas of your image which may be outside the range of gamut achievable when developing photographs from your images. This, therefore, would enable you to adjust your images to pull them into a printable colour spectrum.
The colour profiles provided below, are for the purpose of soft proofing your images (they should not be embedded into an image). For best results you should provide JPEG or TIFF images in an SRGB, Adobe98.
If you order a lot of prints, applying this process to every image would be a daunting task. As a general rule of thumb, most images will be ok. It is usually only images with extreme colours such as intense yellows, greens and violets that may require attention.
When printing an image, out of gamut colours are progressively ‘pulled’ into range. This is done by adjusting all levels of that particular colour so that the human eye should not notice.
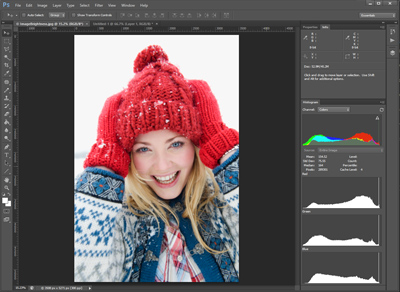
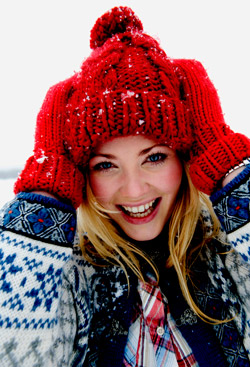
Image brightness is one of the most important things to check before sending an image to print. With most of todays screens offering super bright LED displays, images can be displayed in a way which is not possible to replicate on print.
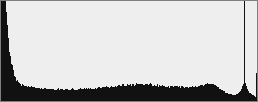
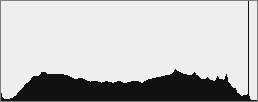
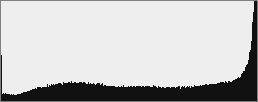
It's far too easy to reduce the brightness of an image to make it appear correct on a super bright display, only to send it to print and be disappointed that it's too dark. To avoid this situation, you should familiarise yourself with Histograms.
Histograms offer you a way to see how bright or 'exposed' an image is, without the illusion that your screen may portray.
Histograms work by showing a graph of the tonal range of an image or colour channel. The graph consists of 256 vertical bars (numbered 0 to 255), where the first bar, to the left, represents total darkness, and the last bar, on the right, represents full brightness. Each pixel from an image is represented within the graph by stacking it on the bar that represents it's brightness.
By default, histograms show all three colour channels combined, but you can usually split them into individual (Red, Green and Blue) channels.
A correctly exposed image should see the majority of the data points spread throughout the middle of the graph, an overexposed image would see more data point towards the right, and an underexposed image would see more data points towards the left.
We offer a free colour correction service on all images that pass through our laboratory (unless you specify for us not to).
Our colour correction is carried out by skilled technicians. If you opt to use this service, you should not need to do your own profiling. If however you would rather do this yourself, you can download and use our ICC profiles for soft proofing which are generated from our calibrated printers.
Download your desired profile above
Unzip the profile.
Right-click on it and select ‘install’.
Move the profile into Library\ColorSync\Profiles.
Open Photoshop.
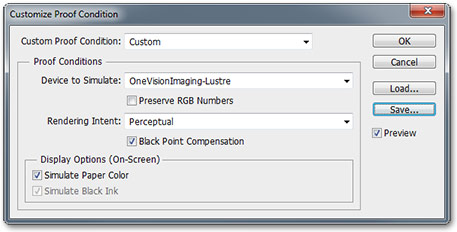
Select View --> Proof Setup --> Custom.
Under ‘Proof Conditions’ set the ‘Device to Simulate’ to your chosen One Vision Profile.
Set the ‘Rendering Intent’ to ‘Perceptual’.
You can save these selections for future use at this point if required.
Exit the dialog and return to your image. Pressing Ctrl+Y will now toggle between your original image and an emulation of how it may look when printed (Your image remains unchanged on your hard disk).
The image may appear dull as Photoshop attempts to reduce the affect of a bright screen.


Pressing Ctrl+Shift+Y will toggle between your original image and showing you colours which are out of gamut. Out of gamut colours will be highlighted in a light grey colour. If you don't see that happen then all of your colours are within range.

We're so confident in our ability to provide you with the best quality photographic products in the industry, that we offer a FREE test print service.
Ready to see your images on prints and wall art from an award winning photographic laboratory?